Customising ESXi image profiles is helpful when you need to add custom drivers to your ESXi installation image. I will demonstrate in this post, how to customise ESXi image profiles using the built-in Image Builder service on vCenter 7. I usually use Powershell to build customised ESXi images; however, non-windows users might find this handy because, as of writing this post, the ImageBuilder PowerCLI module is not supported with Powershell Core.
Step 1 – Enable Image Builder on vCenter
From the vCenter menu, navigate to Auto Deploy and if not already enabled, go ahead and enable Image Builder. If you already use Auto Deploy, the image builder service may already be enabled.

Step 2 – Create Custom Depot
You need to create a custom software depot to store your customised image profile. From the Software Depots tab, press New > Select “Custom depot”, type in a friendly name and press Add.

Step 3 – Add Online Software Depot
Now import an ESXi Installation Offline-Bundle; you can either download it directly from VMware or your hardware Vendor and import it (See Step 5) or, add the VMware online software depot containing the VMware ESXi image profiles. I will add VMware’s online depot for this demonstration.
From the Software Depots tab, press New, Select Online Depot, type in a friendly name and the following URL below and press Add.
https://hostupdate.vmware.com/software/VUM/PRODUCTION/main/vmw-depot-index.xml

Step 4 – Prepair Driver Offline Bundle
Download the offline bundle for the driver you want to add to the ESXi Image. For this demonstration, I’m going to add the USB Network Native Driver for ESXi from flings.vmware.com
Tip: If you download offline bundles via Safari on macOS, you should prevent it from automatically extracting the archive. From within Safari preferences, Uncheck the option, Open “safe” files after downloading.

Step 5 – Import Offline Bundle
To Import the offline-bundle.zip file, select the Software Depots tab, press IMPORT, type in a friendly name and browse your local filesystem for the offline-bundle.zip file, then press UPLOAD; this will add another depot containing the driver software packages.
Note: This is also how you would import the ESXi offline bundle instead of adding it via the VMware Online Depot shown in Step 2.


Step 6 – Clone Image Profile
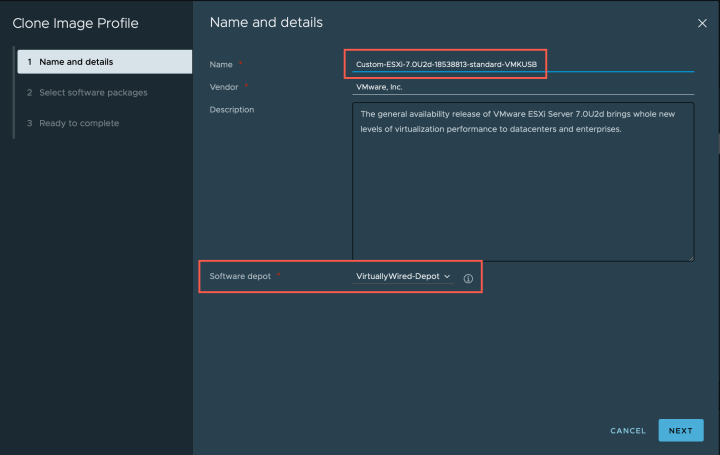
Select the software depot that contains your ESXi Image profile, in this demonstration, it’s the online depot I added in Step 2. Then locate and select the ESXi version you want to customise and build, then press CLONE to start the Image Profile clone wizard. Tip: The VMware online depot contains hundreds of images profiles, so use the “Name” filter to easily find the version you want.

Name your new image profile something meaningful and select the custom software depot you created in Step 1, then press Next.
Step 7 – Customise Software Packages
This is where you can add or remove software packages from the image profile. Depending on the software packages you are adding you will need to select the correct Acceptance Level. From the Depot filter select the depot which contains the driver you added earlier, select the driver you want to add to the image profile and, press Next then Finish.
To understand more about Acceptance Levels, check out, Understanding Acceptance Levels for VIBs and Hosts.


Step 8 – Export and Download Image Profile
Select your custom software depot, and you should see the customised ESXi image profile you created. Press EXPORT, check the option ISO or ZIP archive and press OK to generate the image profile. Note, you can skip acceptance level checking however, Acceptance level checking will validate the VIBs and dependencies.


And that’s it, a successfully customised ESXi Image containing custom drivers ready to download!

To create a bootable USB drive from an ESXi ISO, you can use the Rufus for Windows or if you are using macOS, check out my other post Create a Bootable ESXi 7 USB Installer on macOS.
I hope you found this helpful. Feel free to comment if you have any questions.
Follow @nmangraviti