VMware announced the deprecation of the External Platform Services Controller. vCenter Enhanced Linked Mode was only supported with the External PSC (Platform Services Controller) deployment architecture. With the release of 6.7, VMware announced a simplified vCenter SSO (Single Sign-On) domain architecture by enabling vCenter Enhanced Linked Mode support for the vCenter Server Appliance with embedded Platform Services Controller architecture Starting with vSphere 6.7 and 6.5 Update 2.
In this guide, I’ll demonstrate using the Convergence Tool builtin to the vSphere 6.7 Update 3 UI, and converge an external PSC to embedded on my lab environment, setup with vCenter Enhanced Linked Mode.

Image taken form a new install of vSphere 6.7 Update 3
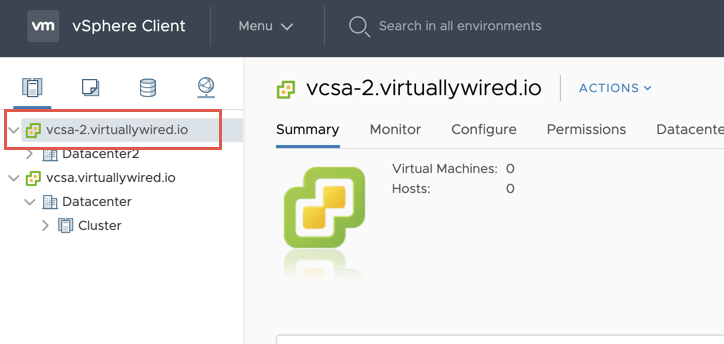
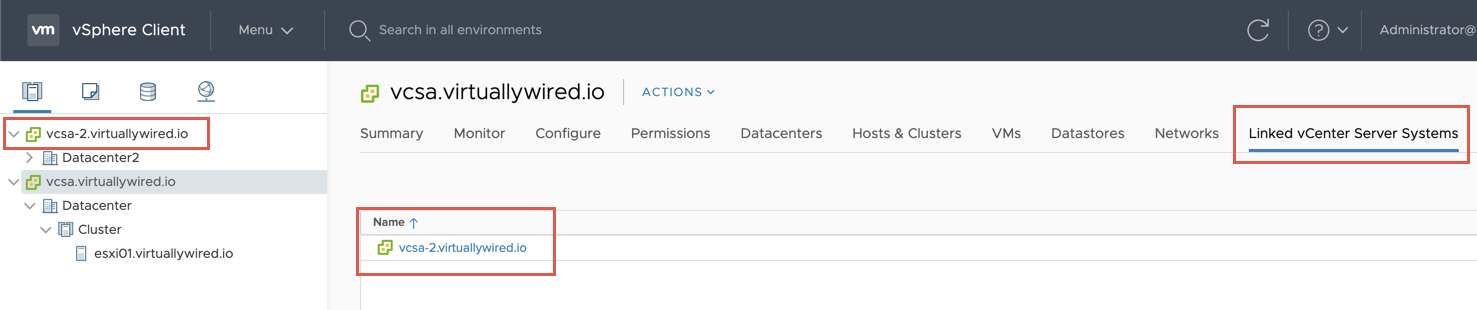
To demonstrate how this works with vCenter Enhanced Linked Mode, I deployed a second vCenter Server Appliance, linking it to the existing external PSC in my lab environment.
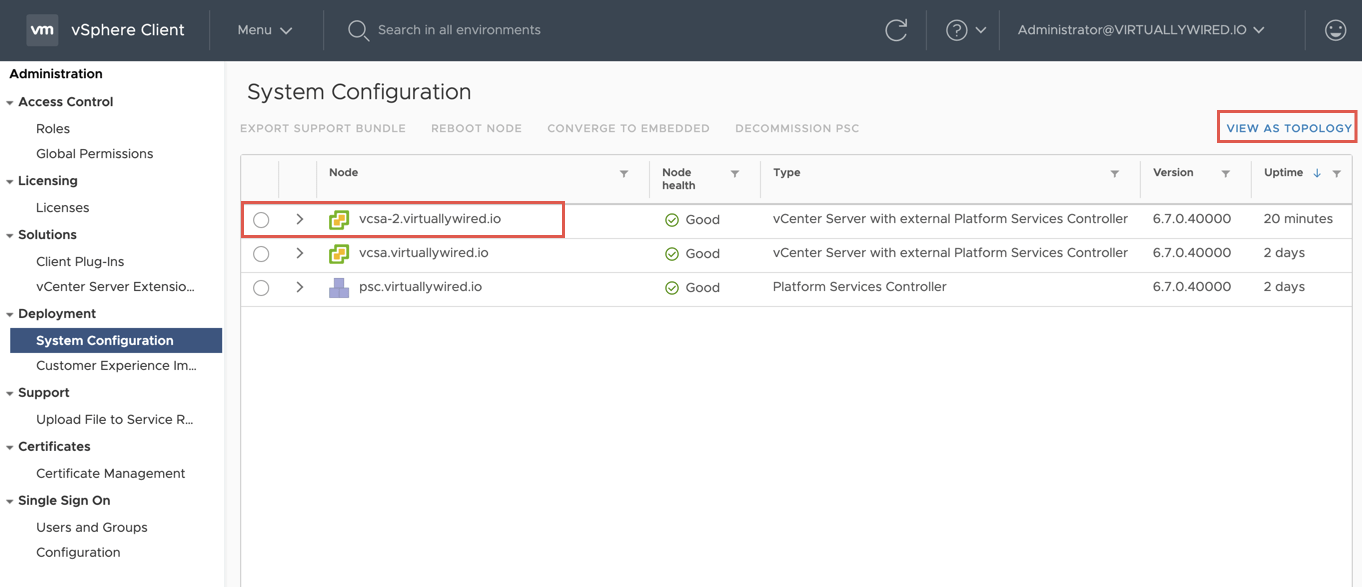
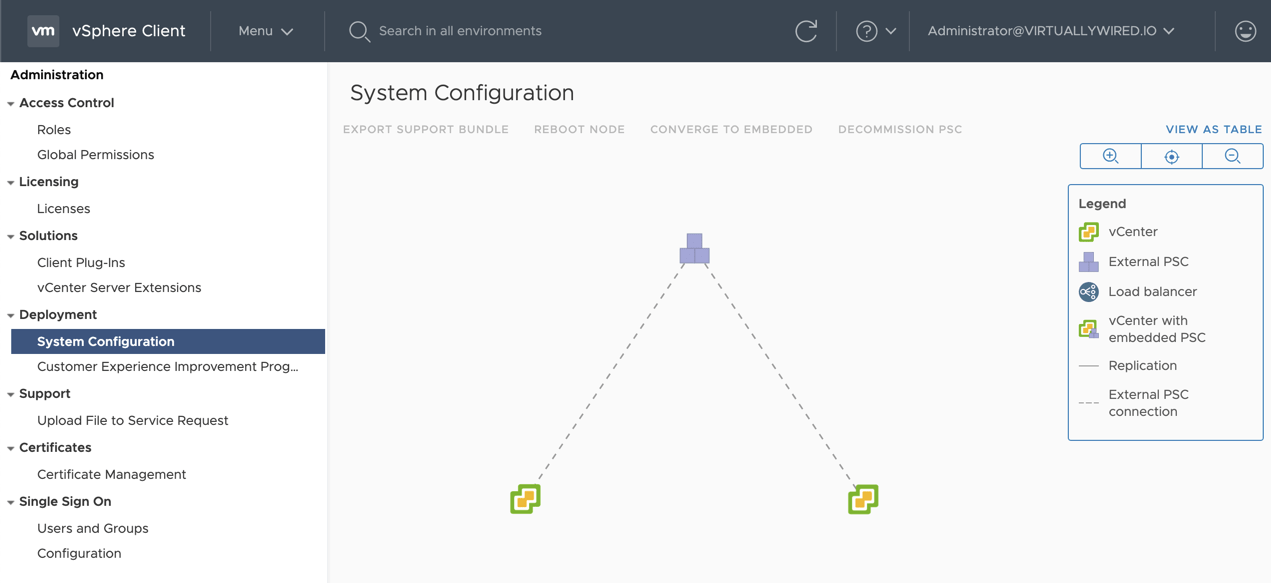
If you navigate to System Configuration page via the Menu, you can see the vCenter and PSC configuration; you may also click on VIEW AS TOPOLOGY to better visualise the configuration.
Preparing for Convergence
Step 1
vCenter will reboot during the convergence so ensure that any services depending it is paused or put into maintenance, i.e. vRA, vROPS, SRM, Monitoring, Horizon etc.
Step 2
You will need to examine your environment thoroughly and identify if there are any additional solutions registered to the SSO Lookup service. In my lab, I only have NSX manager, but if you are unsure you can obtain a list using the method described in this article KB2043509.
I started an SSH Session to my Platform Services Controller and executed the following command.
python /usr/lib/vmidentity/tools/scripts/lstool.py list --url http://localhost:7080/lookupservice/sdkCode language: PHP (php)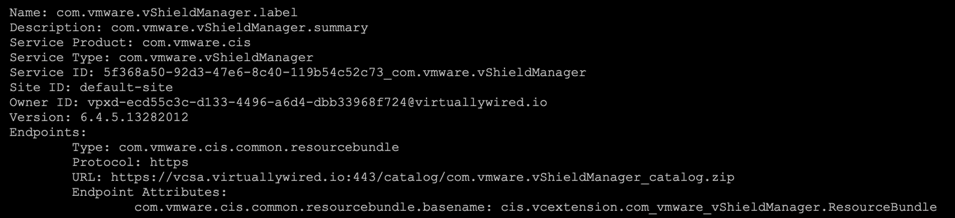

Image taken from NSX Manager Admin UI

Step 3
If your SSO domain consists of multiple PSC’s you may want to check which PSC your vCenter Server Appliance is pointing to. I find this is simple enough to do from the UI under Advanced vCenter Server Settings. Select the vCenter > Configure > Advanced Settings, press the filter icon and type config.vpxd.sso.admin.uri in the text box.

Step 4
IMPORTANT!
Ensure you take a backup and snapshots of all appliances, vCenter’s, PSC’s, solutions etc. I recommend that you look up and follow the supported backup methods for each of the services and solutions as image-based backups or snapshots may not be supported!
Tip: I took multiple backups and snapshots throughout the entire process.
Starting The Convergence
Step 5
Log in to the vCenter; I’ll start with my primary vCenter vcsa.virtuallywired.io, Then from the Menu Select Administration > System Configuration Select the vCenter then press CONVERGE TO EMBEDDED.

A warning ⚠️ stating vCenter Server Downtime will appear advising vCenter services will be restarted and become inaccessible, press PROCEED and continue the convergence process.

Step 6
Unless you are logged into a linked vCenter instance, you won’t be able to monitor the convergence process via the Web UI due to services restarting. I recommend logging into your vCenter via SSH to monitor the convergence log located /var/log/vmware/converge/converge.log
You can use tail to monitor updates in the log file in real-time.
sudo tail -f /var/log/vmware/converge/converge.logCode language: JavaScript (javascript)
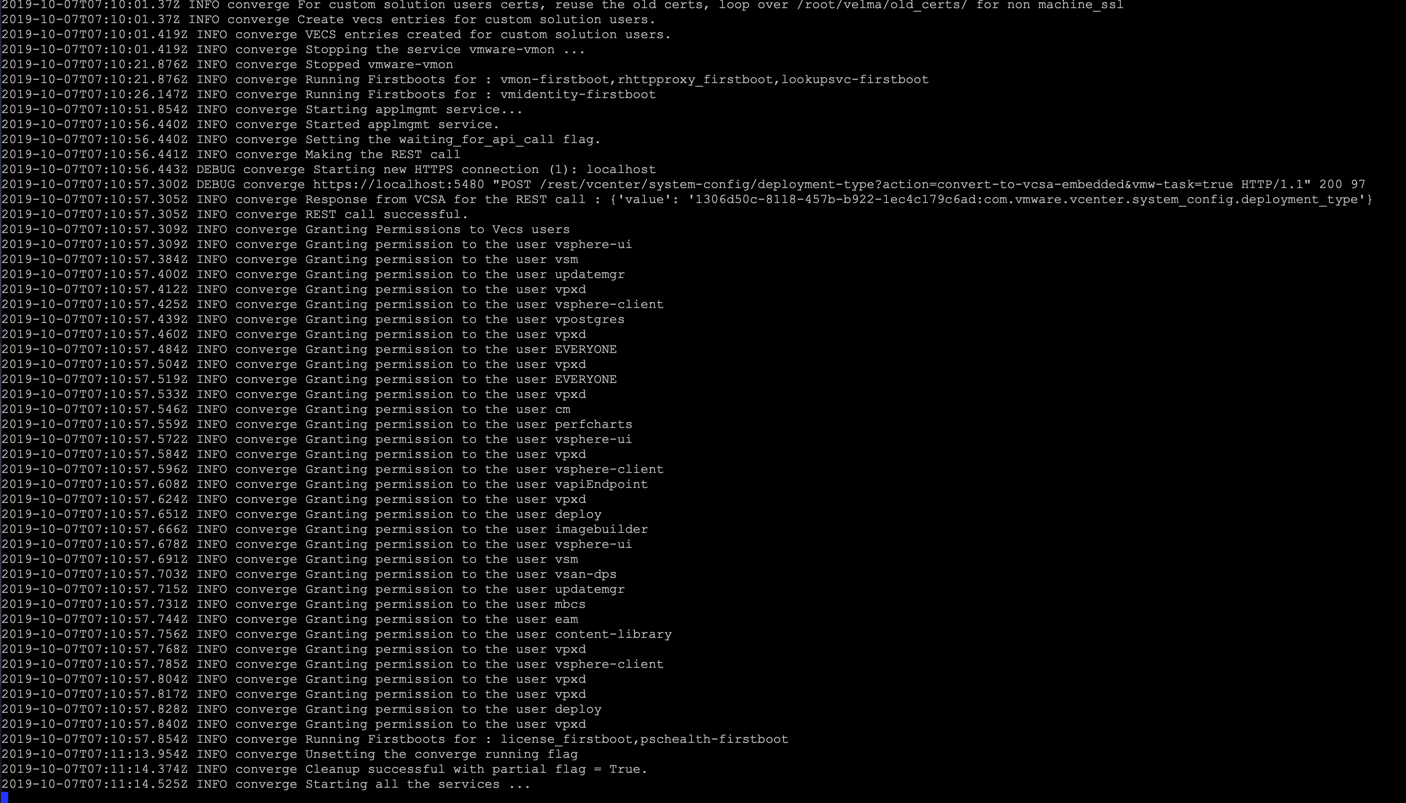
I wasn’t exactly sure when it completed, however, I noticed the converge.log file had not updated for a while. I decided to check the CPU utilisation on the VCSA, and judging by the drop I suspected it had completed.

Step 7
I logged back into the vCenter and checked the System Configuration, and I could see it successfully embedded a copy of the external PSC into the vCenter Server Appliance and were configured as replication partners.

Step 8
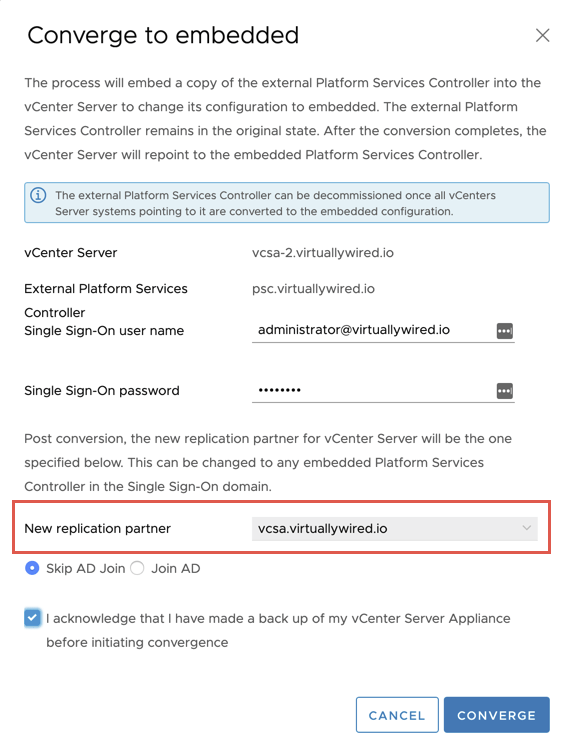
Now it’s time to start the convergence on the second vCenter Server vcsa-2.virtuallywired.io, follow the same process starting from Step 5.

This is where it gets really interesting! To maintain the Enhanced Linked Mode Configuration, the converge tool detected the New Replication Partner as the first vCenter, which is pretty cool! No need to recreate partnerships via CLI.
Step 9
Because I executed this convergence from the other linked vCenter, I was able to monitor the progress via the UI.

Step 10
Convergence for the second vCenter was successful and registered as replication partners to each other.

Step 11
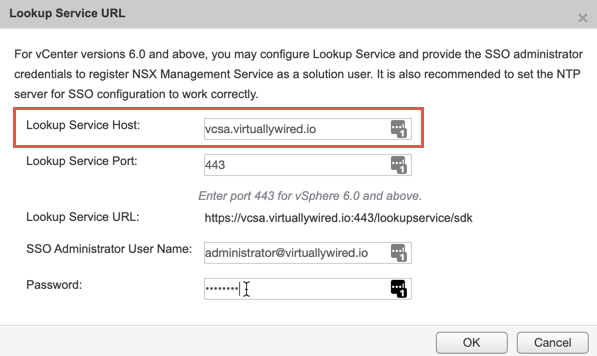
It’s time to repoint any solutions that are registered to the external PSC Lookup Service to the embedded PSC Lookup Service. In my lab, that was the NSX Manager. You should do this before you decommission the External PSC!

Decommissioning the External PSC
Step 12
After confirming all other components were re-registered to the new Lookup Service, I was ready to decommission the External PSC.
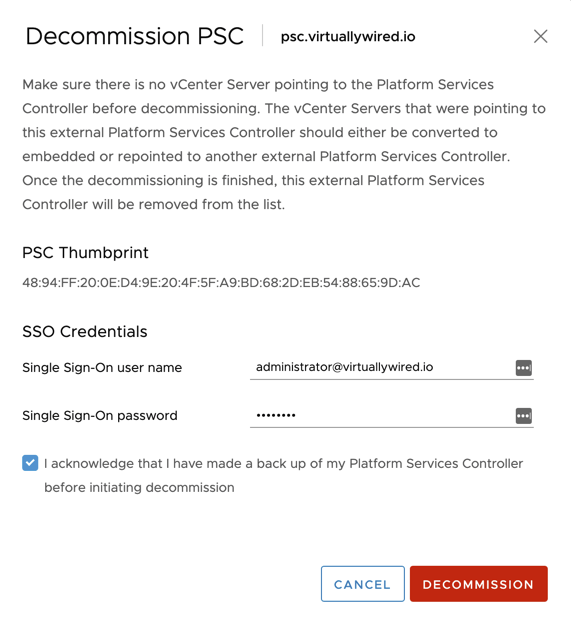
This is done simply by selecting the PSC from the System Configuration page and pressing DECOMMISSION PSC.

You will need to view the thumbprint and check the acknowledgement, then press Decommission. The first time I viewed the thumbprint, I received the error: Failed to get the PSC thumbprint. Ensure PSC port is correct. All I had to do to resolve this was log out and log back in.

You can monitor the first part of the decommissioning process from the UI, the PSC appliance should shut down, and the vCenter server/s should reboot.

After the reboot log back into the vCenter and check the System Configuration page to confirm the PSC removal was successful.

All done! PSC successfully converged and external PSC decommissioned. I hope you found this guide beneficial.