In this post, I’ll show you how to install a valid SSL certificate for your vCenter server for FREE!. For this I’ll use a free, open-source web-based tool by ZeroSSL to generate a Let’s Encrypt SSL certificate quickly and easily. Let’s Encrypt is a free open certificate authority brought to you by the non-profit Internet Security Research Group (ISRG). For more information on how this works, you may visit https://letsencrypt.org/how-it-works/
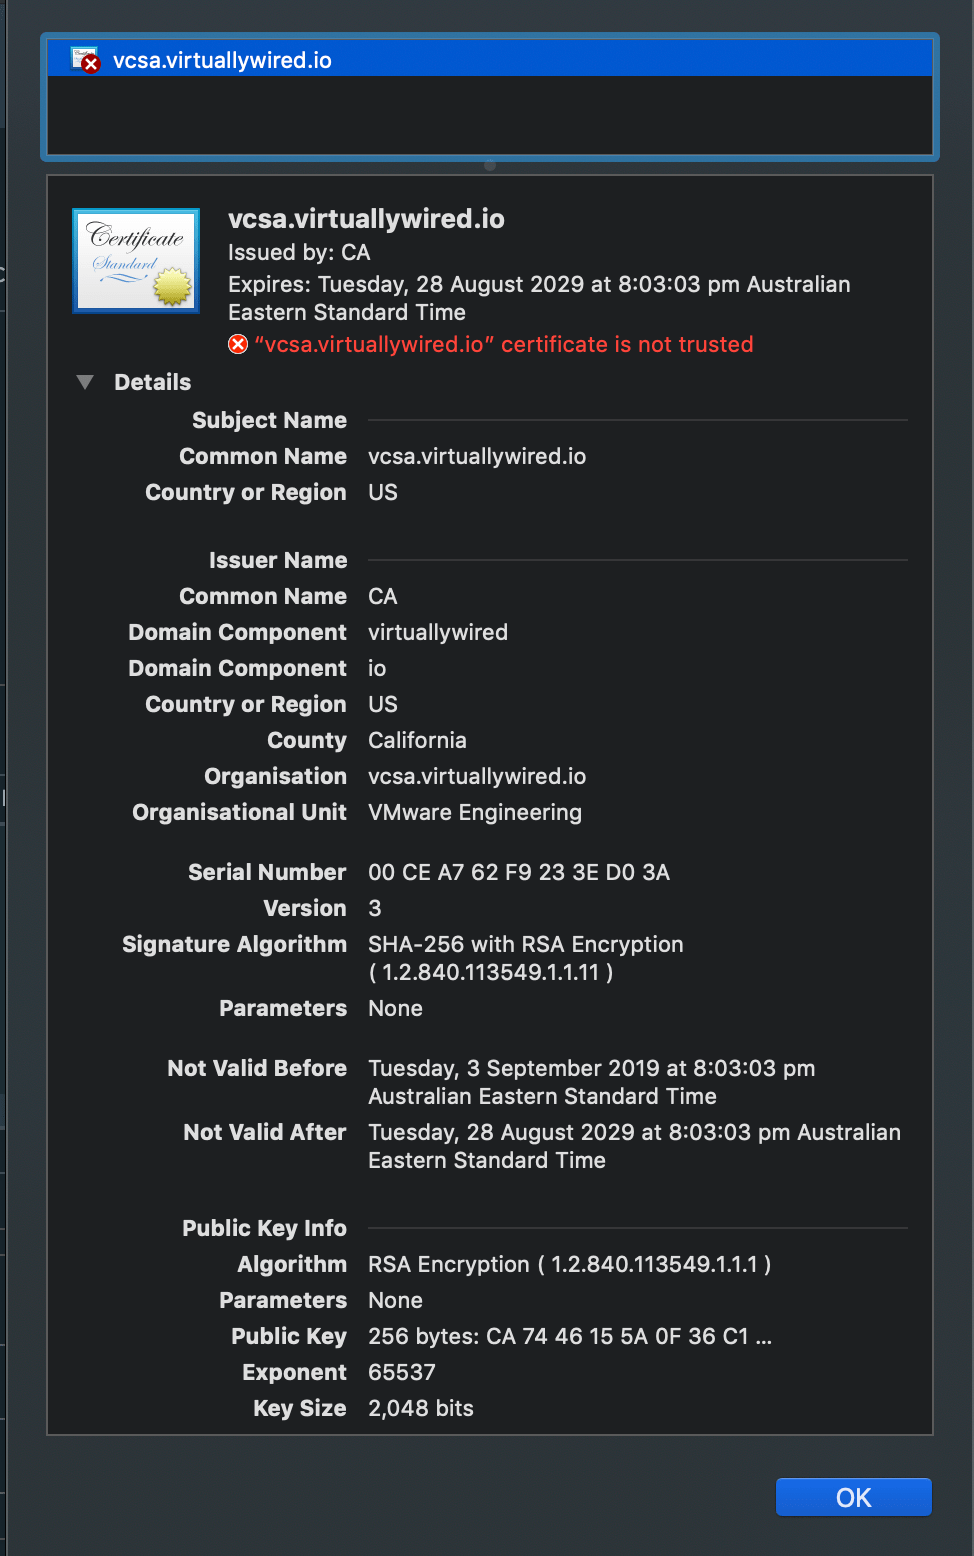
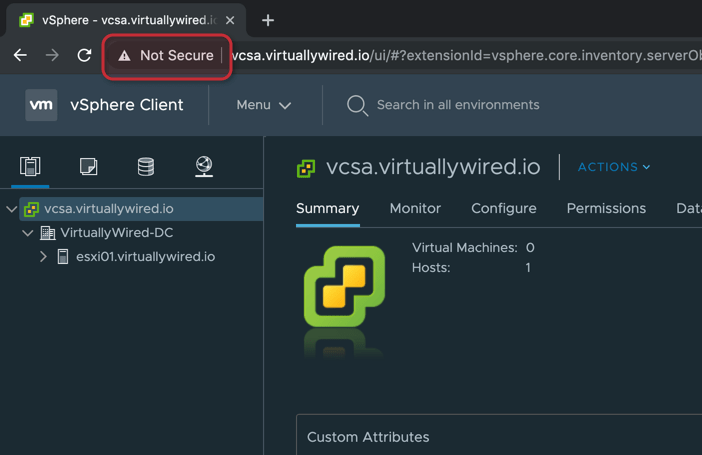
I’ll be demonstrating this by replacing the default certificate, signed by the vCenter Certificate Authority (VCSA) on my vSphere 6.7 Update 3 Home Lab environment.
Update: ZeroSSL has stopped using Let’s Encrypt to issue certificates, and now issuing the certificates themselves, therefore the process outlined in this guide to generate the certificate is no longer valid. For the updated steps please check out my new post Replace Default vCenter Certificate with a Free Let’s Encrypt SSL
Step 1
Head over to ZeroSSL’s FREE SSL Certificate Wizard. Enter the FQDN and ZeroSSL will generate the CSR. Select NEXT, an account key will be generated which is only required if you would like to reissue or renew the certificate.

Step 2
You are required to download the CSR and Account Key before proceeding NEXT.

You are required to download the CSR and Account Key before proceeding NEXT.

ZeroSSL Needs to verify that you own the domain so you will need to add a DNS TXT record with the value provided by ZeroSSL.

Step 3
Head over to your managed DNS provider to add the TXT record. Note this record should be added as a subdomain without the domain extension as shown in the screenshots below.


Step 4
You will need to wait some time for the TXT record to become visible externally, a simple way to check is by using Google’s Dig DNS Lookup Tool. Select “TXT” option and enter the TXT record as provided by ZeroSSL. Keep testing, when the Dig query result displays the correct value, you are safe to press NEXT and download your certificates.

Step 5
Head back to ZeroSSL and press NEXT. Download both the Domain Certificate and Domain Key. The downloaded files default extension is “txt” and requires renaming.

Step 6
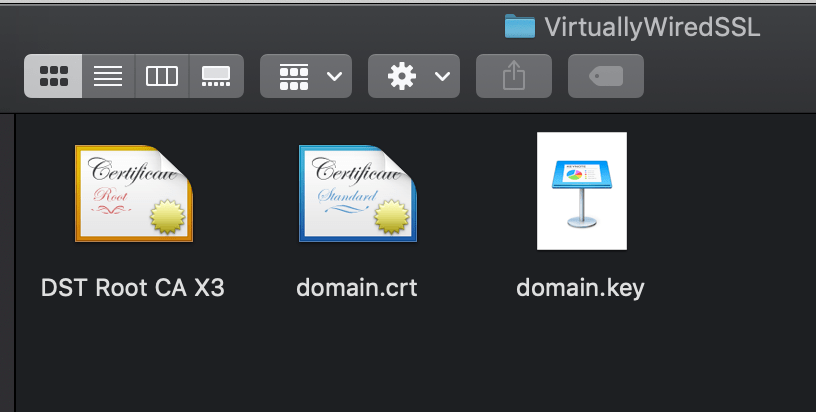
The two files we are interested in is the domain-crt.txt and domain-key.txt, go ahead and rename the file while changing the extensions to domain.crt and domain.key.

Step 7
You will now need to grab the Root CA which is DST Root CA X3 from IdenTrust. Copy the certificate into text file on your computer and save with the extension .PEM.
Step 8
Head over to the vSphere HTML5 client, navigate to Menu > Certificate Management and enter the credentials to login.

You will need to add the trusted Root CA which you downloaded from IdenTrust earlier to the Trusted Root Certificate store located at the bottom. You will then need to replace the _MACHINE_CERT certificate and Key.


Step 9
Now all you need to do is restart the vCenter services or just reboot, when you log back in you should see the certificate is trusted and secured. I hope you enjoyed this tutorial!

Hi Mr Virutallywired thank for sharing a detail post in using free ssl certs.
You’re welcome SlyOne, Thanks!
Just an update side note – ZeroSSL no longer uses LetsEncrypt for their free certs, so the above instructions don’t quite work. They’re using a CA named “Sectigo” and I can’t find the cert file for that root CA.
Hey Chris, Thanks for letting me know, I’ll update the post and find an alternative. Cheers.
Hi Chris, I have posted an update, please check out my new guide https://virtuallywired.io/2020/07/11/install-free-ssl-certificate-for-vsphere-7-home-lab/